Saving a map
How to Save maps?
One of the great features of the GeoHub is the ability to save maps by applying the visualizations and analytics that the user desires after they have logged in.
Requirements
To save a map requires at least a layer needs to be added into the map.
1.Selct a layer of choice at Data tab or Datasets page ![]() icon.
icon.
2.Go to the Layers tab where you can change the layer appearance by using the steps you have learned in the previous section.
--
Note
As we have mentioned at the earlier sections, there are two types of datasets either raster or vector. The way of visualizing is slightly different. Please follow the steps of vector visualization here and raster visualization here
For example, the following figure is an example map which I made.
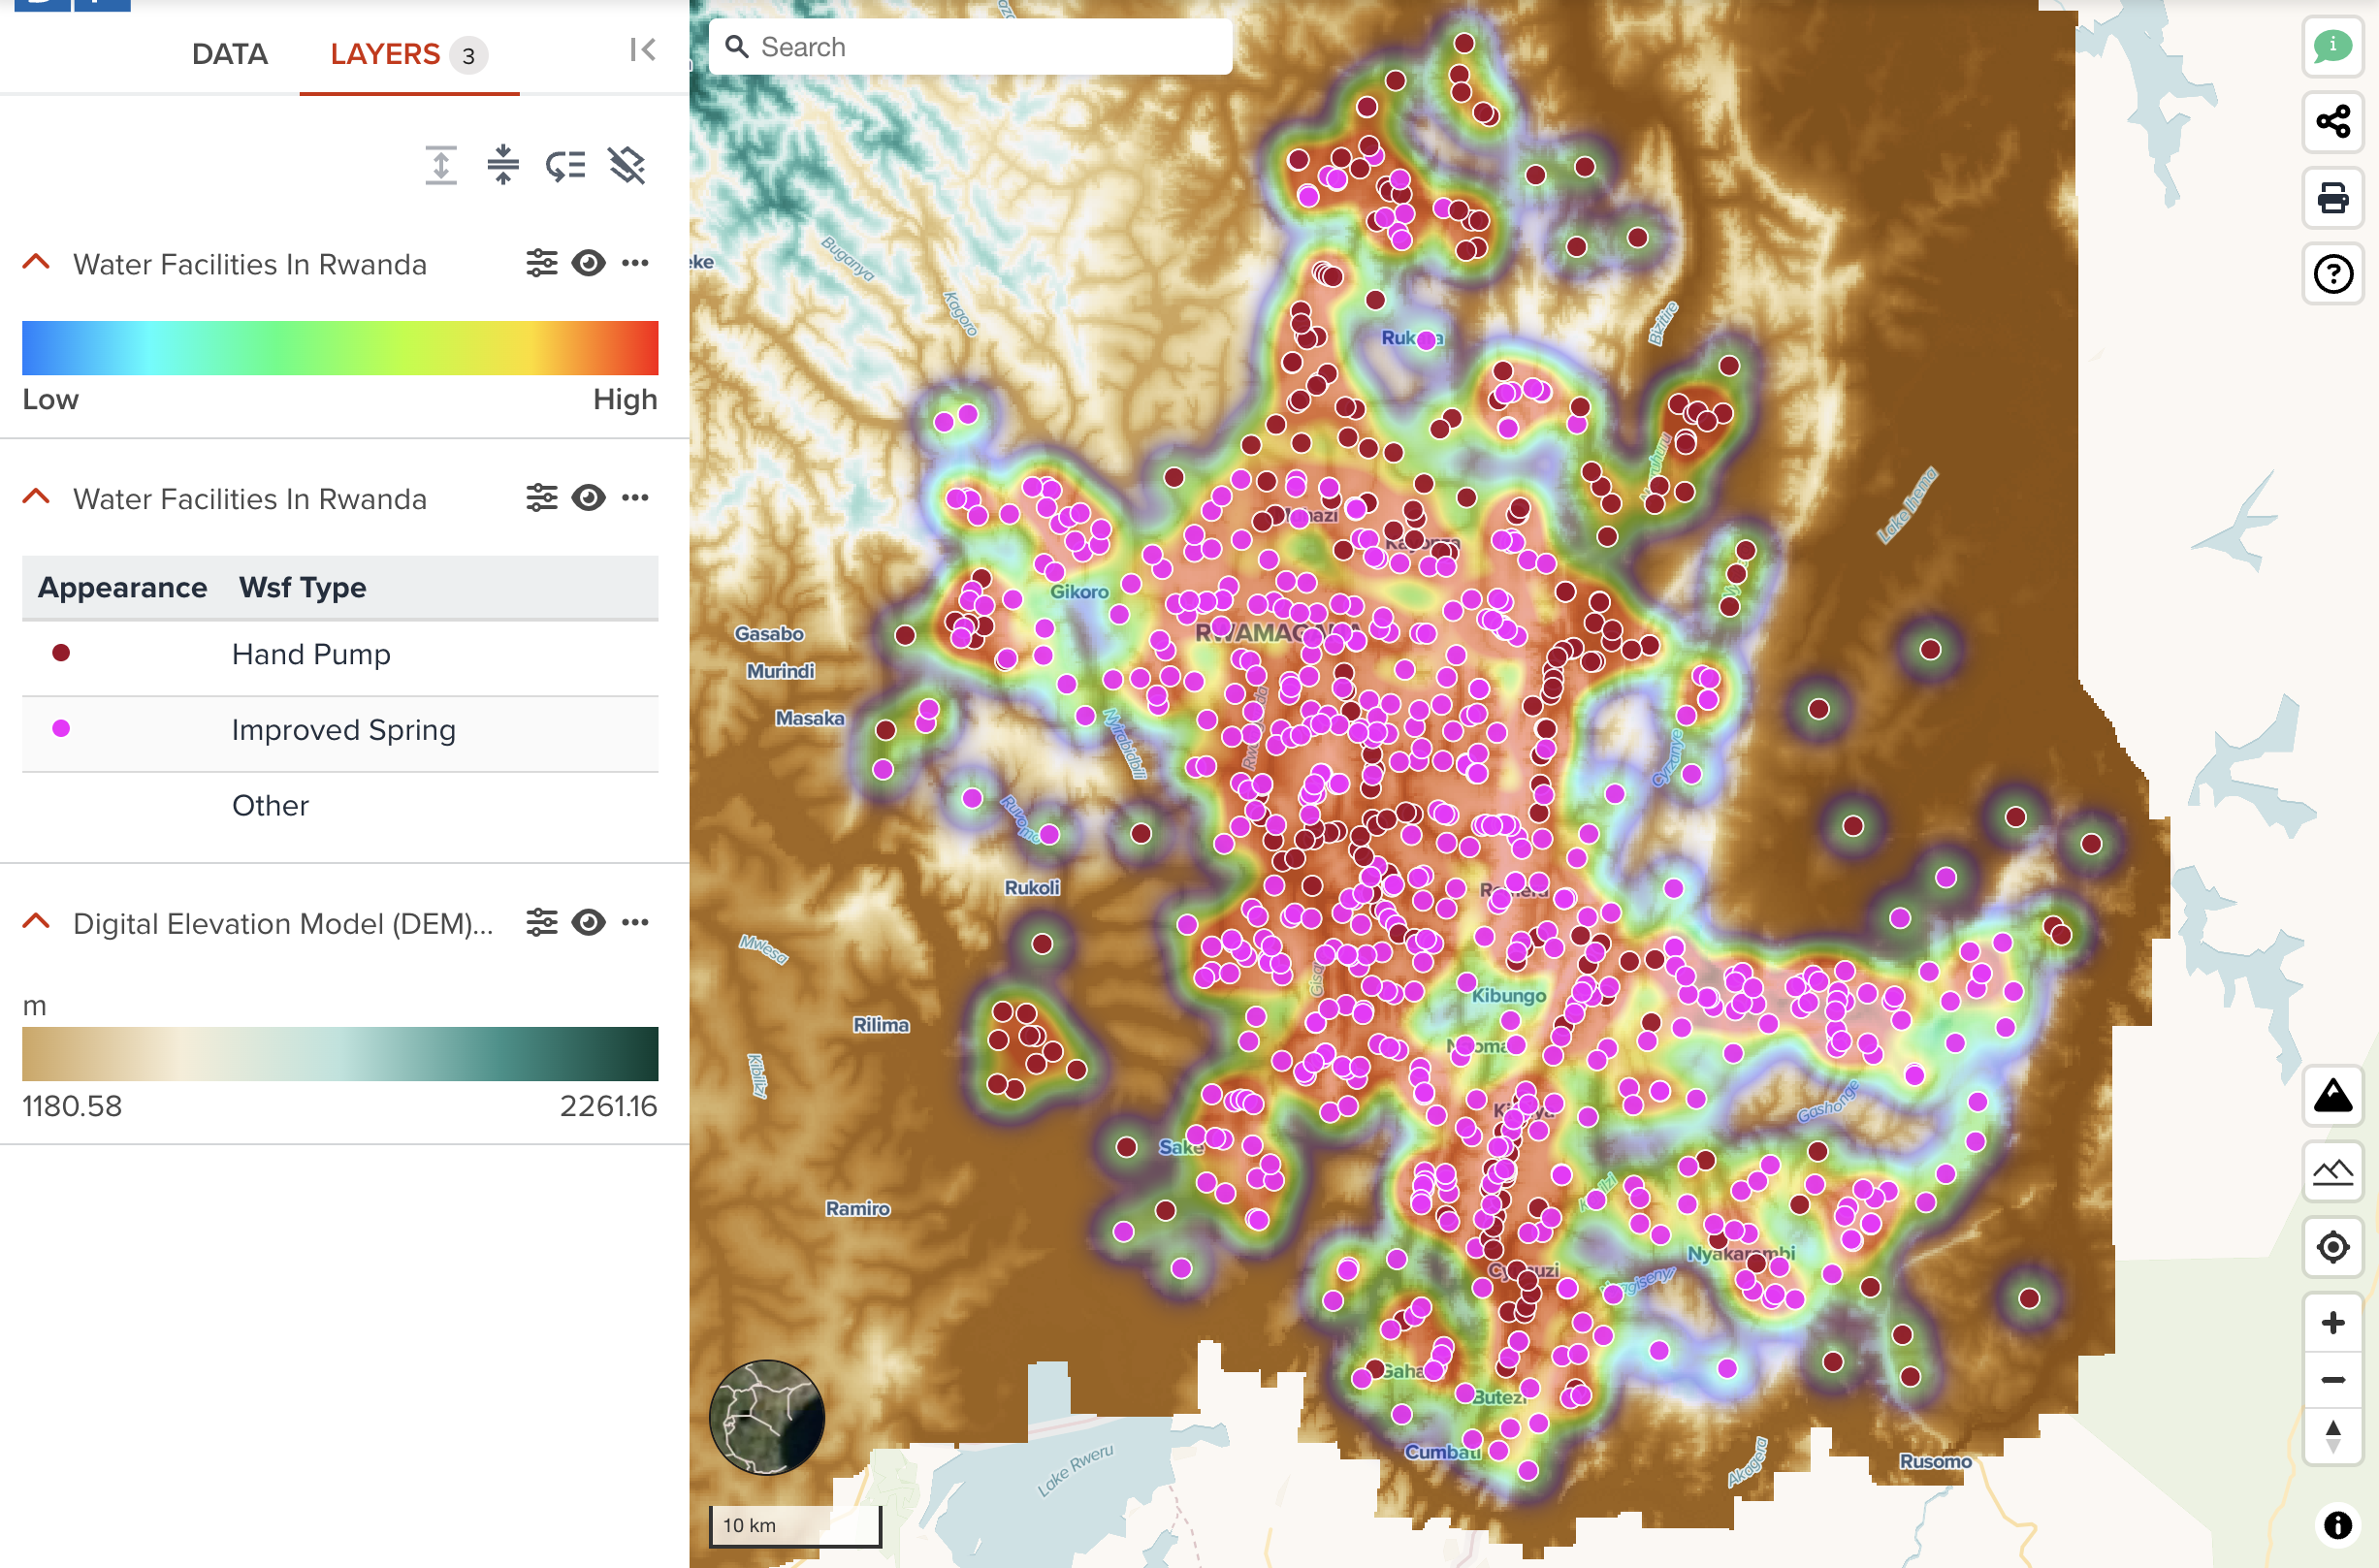
I made a map by the following points.
--
- added Digital Elevation Model (DEM) 10m resolution, Rwanda. But I rescaled it by 1180 and 2261 because I want to make them clear in the area of interest.
- added water facilities in Rwanda data as a heatmap layer. I changed opacity to 30% to make DEM data visible together with heatmap.
- added water facilities in Rwanda data as a circle layer. I visualized circle color by Wsf Type property and adjusted color make them more visible.
--
Rwanda is known as a country of thousand of hills. Understanding how its landscape is quite important for policy making. This map now can show how water facilties were maped in the Eastern Province of Rwanda against elevations.
I renamed title to Location and density of water facilities on digital elevation model at Eastern Province of Rwanda
Now, it is ready to save your map.
Steps to save a map
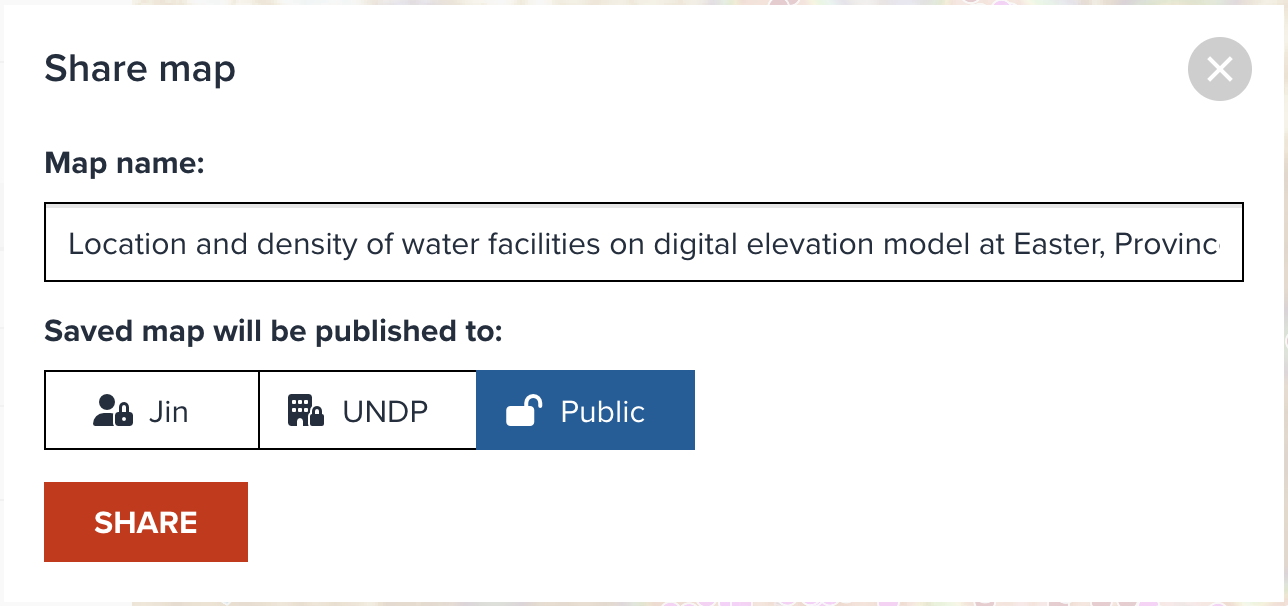
1.Click SAVE MAP or UPDATE MAP button under LAYERS tab. The button name is depending on whether you are going to save the first time or not.
2.A pop up box (shown in the below figure) opens with selections for renaming the map to your liking.
--
Note
As default, it will show the first layer's title as a map name. But it is recommended for you to rename more precise and appealing map title. So, it will become easier for other users to search your map and understand the concept of your visualization. You can still rename this title anytime later.
3.Select the accessibility for map sharing as either only the user, UNDP email holder or Public.
Note
Like the dataset accessiblity, you can also select an accesibility for your map. As default, Your name (private map) is selected. If you are from UN agencies, you may find your organization name like UNDP here. An organization name is selected, only signed in users in your organization can access to your map. If you feel like your map is ready to be published to anyone else, you can select Public accessiblity. The accessiblity can be changed anytime later.
4.Then click on the SAVE button to complete the process or cancel to restart. If you opened an existing map, the button name will become UPDATE.
--
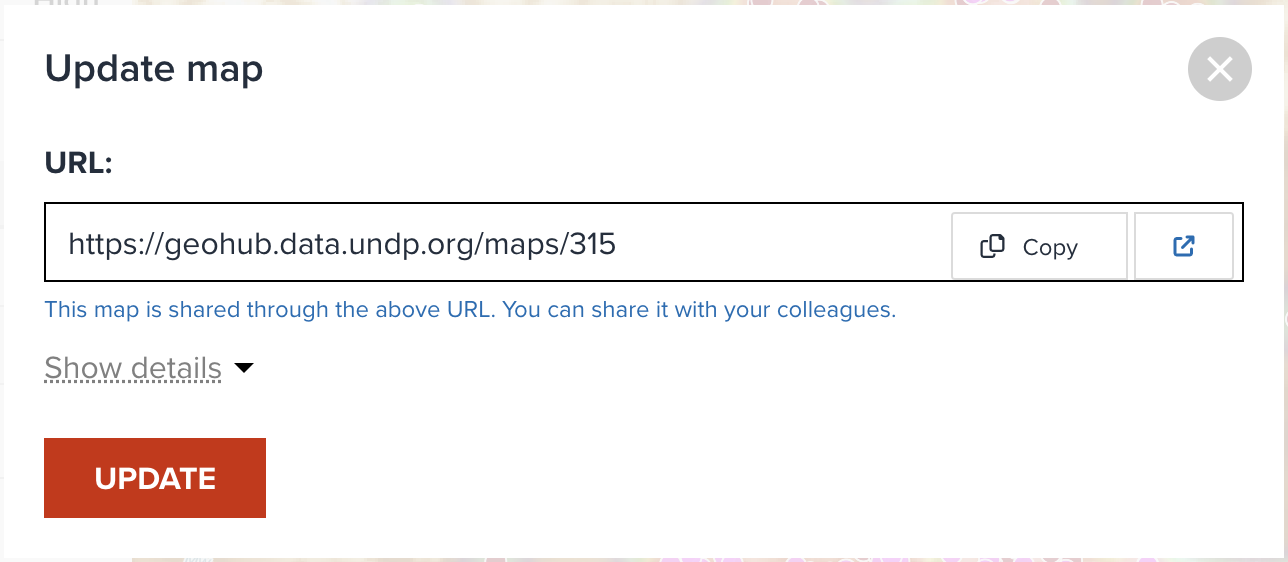
- By clicking
SHAREbutton underLAYERStab, The dialog will show an URL to share with your colleagues as shown in the below figure once you have saved the map to the database. You can simply click Copy button to copy the URL to your clipboard to share it with your colleagues.
Next step
In the next section, you are going to learn more about sharing a map. If you still open the dialog of Share map in GeoHub, click  . This button will open your saved map as new tab. Then continue the next section.